
New rk MILES Building Materials Locations in Vermont
MANCHESTER CENTER, VT – r.k. Miles, Inc., a third-generation, family-owned business with locations in Vermont and Massachusetts, is pleased to announce that the company will be acquiring Allen Lumber, Inc. with locations in Barre, Montpelier, Waitsfield, and St. Johnsbury, Vermont.
Allen Lumber Company, a fifth-generation family-owned business since 1888, has a longstanding, proud tradition of providing quality service, hardware and building materials throughout northeastern Vermont.
“r.k. Miles has a solid reputation as a reliable and trustworthy building materials supplier in Vermont and Massachusetts. We are happy that they will continue our family’s legacy to provide the best products and services our customers have grown to expect,” said Steve Allen, fifth-generation Owner and President of Allen Lumber. “We are looking forward to working with Joe and his crew through a successful transition.”
“This acquisition will help us serve our current, North-Central Vermont customer base with improved logistics and convenient pick-up locations. Allen Lumber is very well known in the markets they serve and have a similar business philosophy so we feel this will be a good fit for both the customers and employees,” said Joe Miles, President of r.k. Miles, Inc.
“We are looking forward to working with the Allen Lumber staff and Allen Brothers, as well as getting to know their local customers,” said Brenda Beanland, Vice President of Operations for r.k. Miles.
Preparation for the transition is currently underway and the sale will take place on March 31, 2020.
About rk MILES
Celebrating its 80th year in March 2020, r.k. Miles, Inc. is a third-generation family business founded in Manchester, VT. The company supplies lumber, building materials and home goods to communities in Vermont and Western Massachusetts. Fair business practices, customer loyalty and community involvement have been the cornerstone of the company’s success. With the acquisition of Allen lumber, r.k. Miles, Inc. will now have a total of 10 locations.
Professional Wall Painting Guide for Walls
Need to freshen up a room in your home with a new paint job? Follow these steps from our Hatfield, MA Paint Pro Steve DeJoy on how to paint a wall to get a durable long-lasting finish.
While these steps are standard protocol for painting any surface, we’ll address painting walls for this blog. You can follow these same basic steps when painting walls, floor trim work and ceilings keeping in mind the subtle differences when cleaning and repairing other surfaces like wood versus drywall.
 1. Determine What Needs To Be Painted.
Are you painting walls, floors, ceilings or trim? This is an important question to start with as each type of project often requires a different type of paint, application style and process. While these 8 steps can be applied to most painting jobs, it is still good to have a plan of attack when starting your project.
 2. Create A Proper Working Area.
Make sure you have the proper space to work. Move or cover furniture and use drop cloths to protect floors so you have a proper working area from start to finish. Although this step can sometimes be tedious, it’s always worth it in the long run!
 3. Clean The Surface.
This is one of the most important steps. You must have a clean, dry surface for paint to stick. Most surfaces will only need a simple detergent like Dawn® dish soap and water, but more contaminated areas, or especially greasy walls may require TSP (trisodium phosphate). If you aren’t sure what the best product to use for your project is, consult with the paint pros here at rk MILES. NOTE: If using TSP, wear protective gear and consult the manufacturer’s instructions to take necessary precautions.
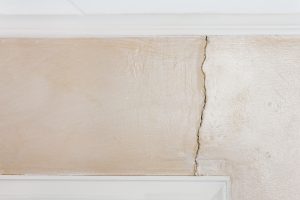 4. Evaluate The Imperfections.
Look for and identify any nail holes, cracks, loose surfaces and imperfect corners. If these are not addressed before you begin to paint, they could pose problems later on in the process.
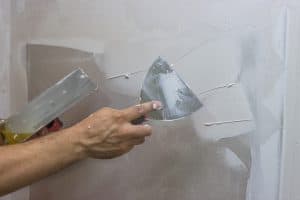 5. Fill & Sand.
Take the time to address these imperfections. Use a lightweight nail hole filler for small patch jobs while larger voids may require the use of wall patches, joint compound or spackle. NOTE: Do not cut corners by over filling in one single coat as most patching material shrinks when it dries, so two or three coats of filler is necessary for larger patches. Make sure to sand your patchwork once complete.
 6. Prime.
Priming is the most important step to make sure that your final coat bonds well to the surface. We recommend that you prime all surfaces that you want to repaint but pay special attention to new patches and repairs. If patches are not primed, they will show through to the final coat (this is called flashing). Priming will create a neutral surface. Caulk if necessary but make sure to use a paintable caulk. NOTE: Have problem areas like stains? Visit our paint pros to learn about special problem-solving primers.
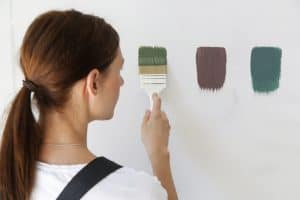 7. Pick Your Color.
This is often the most difficult step. The only way you should pick your color is by seeing it in your space, in the light that it will be presented. We recommend that you don’t just rely on paint chips at the store to help you choose but rather buy a few paint samples and apply large patches to the wall or room. Look at your color samples at the time of day you will use the space most – if you only use that space when there is a lot of natural light, look at the sample colors at that time. If you only use the space in the evening with lamplight, then look at the samples then. Bottom line, never choose a paint color in the store without testing it first.
 8. Pick A Topcoat Finish.
The type of surface you are painting will often determine your topcoat finish. For example, if you have a wall with a lot of imperfections to cover, use a matte finish. If you don’t have a lot of imperfections, then you can use an eggshell finish. If you want your walls to be washable, like in a kitchen or bathroom, then use a satin finish. For trim work and doors, it is best to use a satin or semigloss finish.
Guide on How to Check Who Made Your Cabinet
Have you ever needed to replace a cabinet, door, or part in your kitchen but don’t know where to start? This can often be confusing so Kitchen and Bath Designer DeAnna Martin from our West Hatfield store has created this helpful guide to get you started!
Identify your cabinets’ brand
The easiest way to match or find replacement parts for existing cabinetry is to first identify the brand. Cabinet manufacturers use different methods for branding their cabinets.
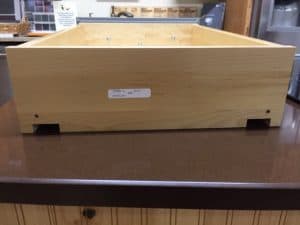
Check the sides of the drawer boxes
Some manufacturers will brand the inside, or outside of the drawer boxes with their logo as seen below.
![]()
![]()
![]()
 Check behind the drawer boxes for brand or additional information
If you don’t find a logo on the side of your drawer, remove the drawer from the cabinet base and look on the back side for a label identifying the manufacturer and order information. Some companies may hand write this information instead of labeling it. Companies like Candlelight Cabinetry logo their drawer boxes and also provide a label on the back side to make the reordering process is as easy as possible.
Check underneath your wall cabinets or side panel in your sink base cabinet
Other manufactures will have a printed label on the bottom of the wall cabinets or on an inside panel in the sink base cabinet. In addition to telling you the brand, it will sometimes tell you the color, door style, and construction of the cabinet. Snap a picture of this label or make a note of the details as the cabinet dealer (like rk MILES) should be able to decipher the construction details of your cabinet.
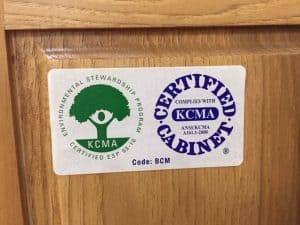 Check your sink base cabinet for a KCMA Label
Cabinet brands that belong to the Kitchen Cabinet Manufacturers Association (KCMA) will have a sticker on the back side of the sink door or side wall of the cabinet. On the sticker there should be a code or the cabinetry name in the middle of the label. For example, on a Bertch Kitchen+ door, the code is BCM. The KCMA website has a tool that you can then use to find a manufacturer.
Once you have identified the brand, you can check the cabinet manufacturer’s website to find your local dealer. It is recommended that you bring a cabinet door with you when you meet with your local dealer to make sure replacements will match the finish and style of your existing cabinets.
Finally, if there is no indication of a manufacturer on your cabinets, there is a chance they were custom built by a local cabinet maker or builder. If this is the case, replacements can still be made and parts can be found. Be sure to contact us if you have questions!
*Kitchen & Bath showrooms and services are in our West Hatfield and Williamstown, MA stores only
Marvin Unveils New Name, Logo, and Product Collections
 rk MILES is excited to announce changes to one of its trusted company partners – Marvin Windows and Doors. Known for a spirit of innovation and commitment to people, Marvin Windows and Doors is evolving to design and build better ways of living. New changes that reflect this evolution include combining the brand with Integrity Windows and Doors to be known simply as Marvin moving forward. Additionally, Marvin has reorganized its product portfolio and developed several internal initiatives to support continued product introductions that are truly customer-centric.
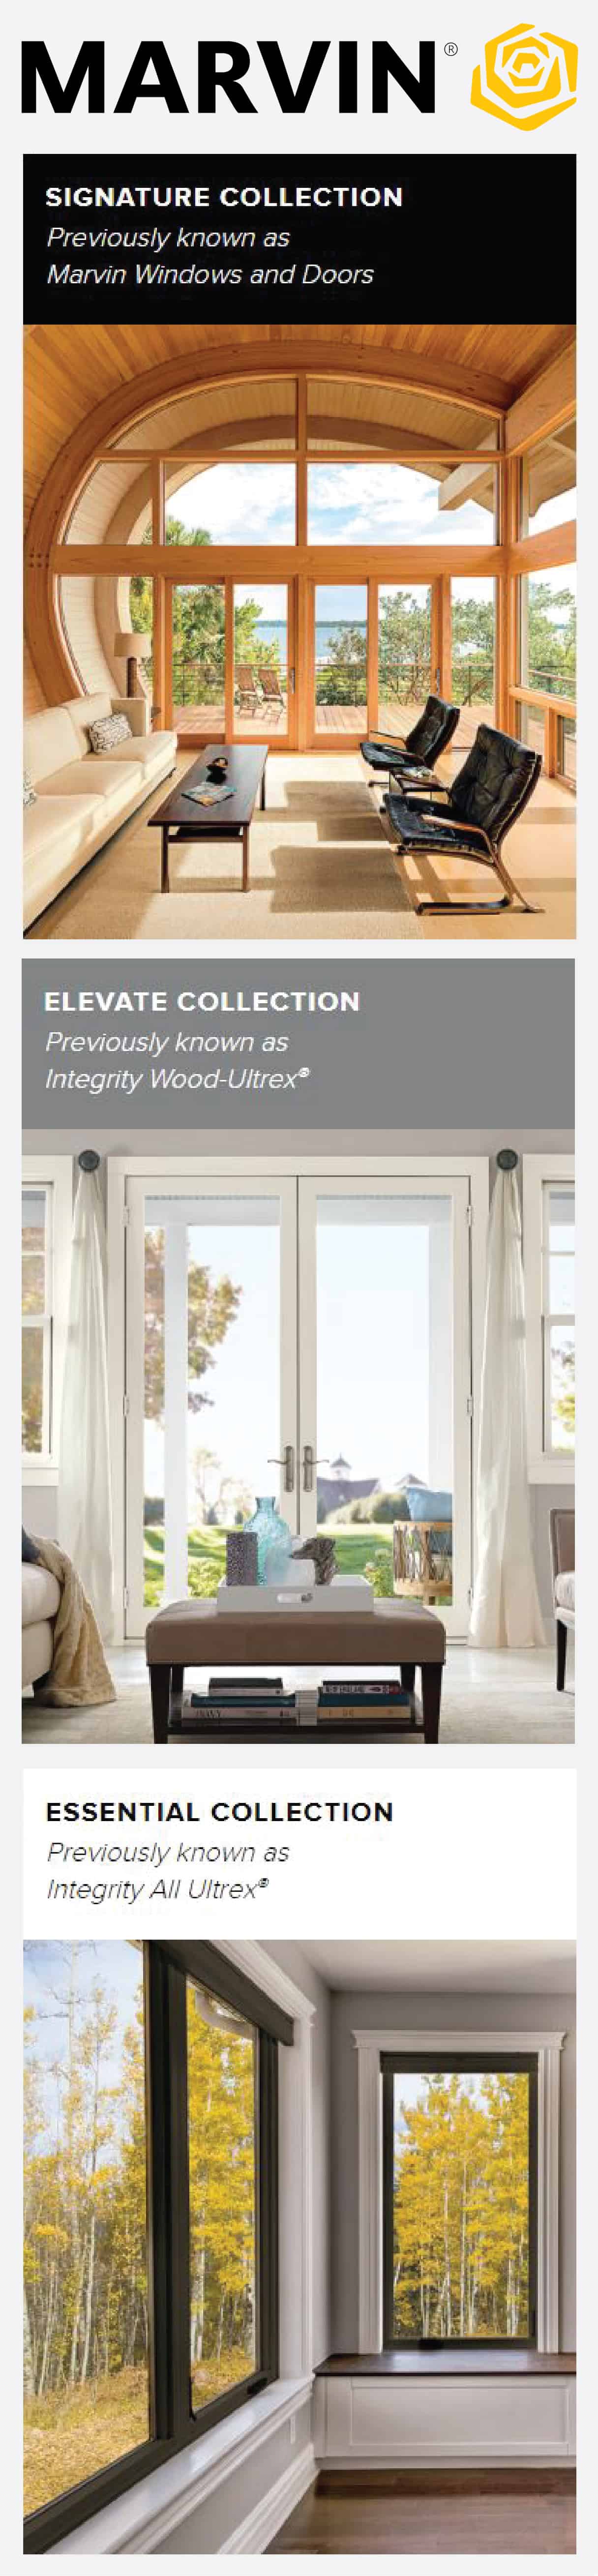
Reintroducing Marvin
The Marvin brand now represents all fenestration products previously known as Marvin Windows and Doors and Integrity Windows and Doors, with both of those brand logos now retired.
Refreshed product collections
Three product collections now organize Marvin’s window and door products to help customers find the right solutions for their projects, making it easy to create beautiful homes that deliver on every customer’s unique needs.
Signature Collection: Design and category-leading innovation
As Marvin’s most aspirational product line, the Signature Collection features the broadest range of product types, styles, configurations and design options. Ideal for creating exceptional spaces in which every detail is thoughtfully considered, the collection includes the products previously known as Marvin Contemporary Studio and also includes what will continue to be known as the Marvin Ultimate and Marvin Modern lines.
Elevate Collection: Beautiful design, superior strength
A resourceful option, the Elevate Collection offers a balance of creativity, vision and reality, hitting a sweet spot between differentiated, highly valued features and price. The curated collection includes products previously known as Integrity Wood-Ultrex.
Essential Collection: Streamlined, versatile and maintenance-free
For those who wish to reduce complexity without sacrificing quality, the Essential Collection offers accessible design with a simplified approach. Featuring clean lines and simple profiles, the Essential Collection offers versatile style solutions with superior strength and durability. The collection includes products previously known as Integrity All Ultrex.
As a proud dealer of Marvin for more than 30 years, rk MILES is looking forward to incorporating these new changes from the company over the next few month. For more information about the new Marvin brand, visit www.marvin.com.
Announcing the NEW rkmiles.com
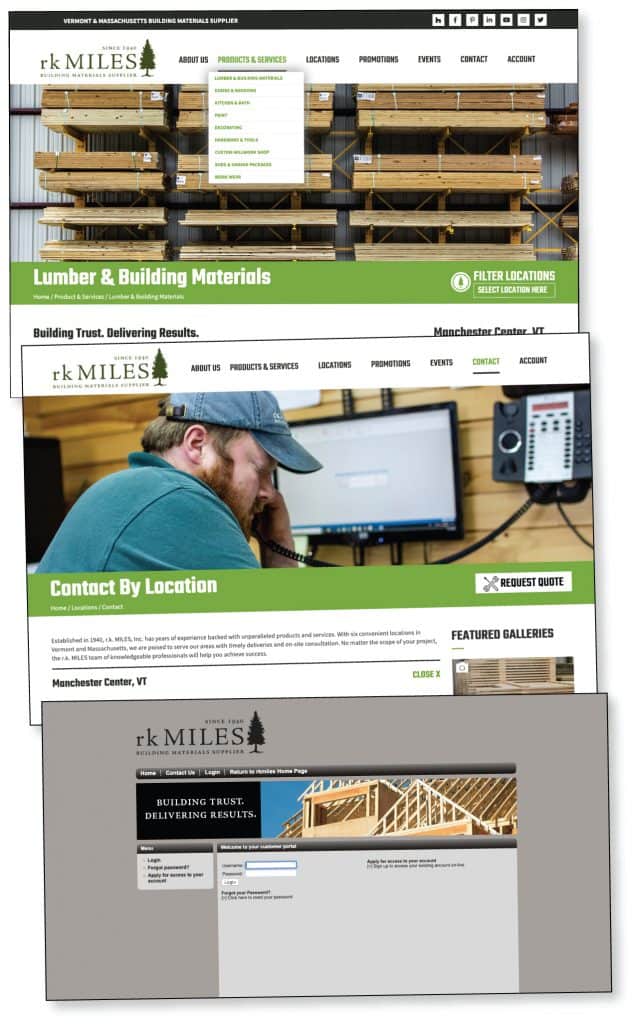
Welcome to the NEW rkmiles.com. We have redesigned our website to be more user-friendly. Whether you are a General Contractor, do Commercial Construction, or you are a Homeowner, you can find what you need right at your fingertips!
Here are changes that we think you will find more helpful:
• Clear Navigation Menu right at the top!
• Easy access dropdown menu to our Products & Services- with location filters to find what is available at each location!
• Easy access dropdown menu to each location for a quick view of featured products and service by location!
• Easy access to current Promotions, In-store Events, and Classes (filtered by location)!
• Quick access to our Contact information filtered by location!
• Easy iNet Account Access!
Plus: You will see useful resource links, downloadable documents, and tools throughout the site. Have questions? Want to Request a Quote? You can do that too!
Check back here often for blog posts, news and helpful links!
Check out the site and happy surfing!
-rk Team